Pages

May 31, 2016

Should You Keep Your Kit Lens?


Many people believe that because the kit lens comes with their camera and is so cheap, it must not be good for much of anything. The standard 18-55mm kit lens, however, can be a very useful lens if it is in the right hands. 
Here's a list of pros and cons for this lens.

If you're a beginner, having a kit lens can be very useful to you. It doesn't zoom further than 55mm, so, while it may be helpful to zoom further, you will not have to deal with as much camera shake due to the short focal length.


The widest setting, 18mm, is great for landscape and wider shots.
So should you keep your kit lens? Well, that's for you to decide. If you don't have many lenses yet, keeping it may be a wise idea. However, if you already have several other lenses that you find yourself using more often, selling your kit lens could be beneficial as long as your other lenses can still meet your needs.


May 28, 2016

Composition: The Rule of Thirds

The rule of thirds is a composition rule that helps photographers compose their images in a way that will draw the viewer in to look at a specific subject.
It woks like this:
You split the image into thirds in  both directions.
Your subject gets placed on the points where the lines intersect with each other.
In the photo above, the subject lies on two points where lines intersect. One point is at the eye; this gives some emphases to the eyes by using nothing more than a simple composition technique.

Using the rule of thirds with landscapes

This rule works mostly the same for landscapes as for portraits or any other kind of photography. The only difference is that you may be unsure of what your subject is in the landscape. It's important to have a subject and points of focus when you take a landscape photo or you may end up with a more abstract photograph. (which can be good if that's what you're going for, but that's not the focus of this post)
This is an example of a landscape photograph that has no subject. It may be hard to understand what this photo even is because there is no focus on any kind of subject. 
This photo begins to improve in this matter. However, there is still not clear subject besides the sun.
So, how do you use the rule of thirds to compose your landscapes into great photographs?

Find a subject and find elements you can use to draw the viewer's eye to that subject.
Your subject can be anything. A tree, an animal, a building, or anything that you find interesting enough to hold the position of the subject.


May 25, 2016

Photographer's Guide: How to Prepare For a Photo Shoot

When you're preparing for a shoot, it is important to think about what kind of photo shoot it is going to be. It is a portrait session? A landscape trip? Think about where you're going and what you're going to be taking photos of. Here are some lists of things to bring to your sessions.

For a Portrait Session:


Necessities: 

  • A camera that meets your needs for that shoot. (are you shooting low light portraits? Bring a camera with good low light performance)
  • One or two good portrait lenses. You'll probably want lenses with a good aperture range so you can get good depth of field. Something that can shoot at F1.8 or shallower is ideal, although not necessary. You could survive around F3.5 or maybe even F4 depending on your situation. However, with a lot of portraits it is helpful to have a shallow depth of field. Prime lenses are good for portraiture because of their often shallower depth of field options. a 35mm, 50mm, or 85mm prime lens could be a good option for portraits.
  • A good flash. You will never want to use the on-camera flash and if you need extra light in your image and you didn't bring an external flash, you're stuck in a bad position.
  • A reflector. You're probably going to want the face to be lit as well as possible. If you're outdoors, a reflector can be very helpful because it allows you to harness the natural light and point it where you want it to go. In a studio, reflectors are still helpful because they can reflect a gentler and more subtle light than if you were to point a bright studio light at the subject.
Optional:
  • Lights. You may want to bring some lights in some situations. If you are in a place with bad lighting, bringing your own can help tremendously.
  • A telephoto lens. If you don't have the option of a good portrait lens with a shallow depth of field, a telephoto lens could help you out.  Even if you're at F5.6 or smaller, a telephoto lens can mimic a larger aperture when it's zoomed in. At 300mm you can get a decent depth of field without having to set the aperture to a wide setting.
  • Flash diffuser. This can be a useful tool if you're looking to get more light into the photo, but want to keep a softer look.
  • A tripod. I didn't put this in necessities because you can do handheld portraits. However, if you're using a telephoto lens, you will want a tripod. You may want to use one even if you're not using a telephoto lens.

For a Landscape Shoot:

Necessities:
  • Wide-angle lens. You'll want a lens that can go 20mm or wider. You will not want to have a minimum focal length any longer than 24mm and if you have a lens that goes wider than that (15mm or even wider), bring that lens.
  • A camera that fits the needs of the shoot. Think about the time of day you're going, the light, and if you're going to do any long exposures.
  • A tripod. It's possible to shoot landscapes without a tripod, but I find it easier if you have one on hand.
Optional:
  • ND filter. If you're doing long exposures, an ND filter is essential. Especially if you're doing the long exposure during the day.
  • Polarizing filter. If you're shooting somewhere with water, you may find this useful, or if you're looking for a more blue and contrast-y sky. This filter will remove reflections from water and make the sky look blue-er and have more contrast.


May 22, 2016

5 Ways to Use Your Photos (Besides the Basic Prints)

1. Turn Them Into Greeting Cards

Greeting cards can be a simple and effective way of using your photos. People use them all the time and they are a great way to get your work out to lots of people.

2. Sell Them Online

You can sell your photos online from many different sites. A few include Shutterstock, Stockfresh, and Crestock.

3. Start a Blog


You can start a blog for free using many websites and some have options that will allow you to make money. But don't do it just to make money, do it because you actually want to. Starting a blog is a huge commitment and you won't earn much from it at first.

4. Enter a Photography Competition

Some competitions have cash prizes, and others may have some other form of prize for the winners. Take your chances at a competition, you have nothing to loose by entering (Unless you have to pay for submission, anyway. If you're not totally confident with your work yet, those competitions are best avoided until later on.) Even i you don't win, you can always learn from the experience.

5. Write and Sell a Book

If you know about photography, why not share your knowledge with others? Write a book and include photos that you've taken.

May 17, 2016

Killing "Photographer's Block": A Guide to Creative Photographs


Here are some tips to get out of the hole you get stuck in when you have no ideas for creative photography.


  • Look at other photographers' work
Get inspired by browsing through other peoples' work. Recreate a photo that you love and make it something new with your own personal touch to it.
  • Just go out there and start shooting
Sometimes when we feel unispired, we feel like we need to think of something to photograph before we can go take pictures. However, sometimes the best photos come when you have no plan. Just grab your camera, take a walk, and snap pictures wherever you can. You may be surprised at what you can create.
  • Get out of your comfort zone
Try something that you think you'll fail at. If you fail, that's okay; try again and don't give up. 
  • Try a new angle
Try shooting at an angle you've never tried before. Get low, get high, squeeze inbetween some rocks and shoot that photo at a totally new angle. See what you can come up with.
  • Get a change of scenery
Try going somewhere new to photograph. You may be feeling that your photographs are uncreative because you keep photographing the same places over and over again. While it can be good to photograph in the same area more than once, it's also good to go somewhere new.
  • Try a kind of photography you have never tried before
Always doing portraits? Try landscapes! Always photographing wide-angle? Try shooting some macro shots! 
  • Work with someone else
Collaborating with other photographers is a great way to get inspired. You can help each other create those epic photographs, and you could come up with ideas that you may not have thought about separately.
  • Capture emotions that you love
You love to laugh and be happy? Find joy around you and take pictures of it. Try to capture the emotion in a single photograph. It can be harder than you think, but it's worth it to see the emotions painted onto the photo.
  • Start a new project
Try a project such as a 30 day photography challenge. Search photography challenges and projects online and see what you find. Or make your own!
  • Try to find an interesting way to photograph something that you find boring
Find a subject that you find extremely boring and see what you can do to make it more interesting. There's a boring nail sitting on your desk? See what you can do to make it into an epic photograph. Or turn a light switch into something awesome. Anything you find boring could have the potential to be an amazing photo.

May 16, 2016

Free Photo Editing Software: Polarr

There are lots of budding photographers who need good editing software for their photography, but don't have the money to buy expensive programs like Photoshop or light room. If you're one of those photographers, you've come to the right place.

Polarr is one of the best free photo editing programs that I have ever used. It gives you plenty of editing options and the design is easy to learn.
The features it offers are powerful enough to create professionally edited photography quickly and easily.


May 10, 2016

Photographing Animals

Animals are a difficult subject to photograph. They're always moving around and they don't understand what you're doing when you point a camera at them. If they're wild animals, they can be easily scared. Domesticated animals are the easiest live animals to photograph because of this reason, however they can still be a challenge. 

Here are some tips for both:

Domesticated:


  • Have some form of food to bribe the animal with. Something that you know they like. If your pet cooperates, give them a treat to reward them. This will encourage them to continue behaving for you.
  • Allow them some freedom to find a comfortable position. Don't try to cram them into a terribly uncomfortable place as it will cause them to become more restless and begin wanting to get out of the situation. Allow them to find a position they like. This will give you a more natural photograph and make it easier for you because they will be more likely to stay still.

  • Don't get frustrated or angry with them. They don't know why you want them to stay so still and they don't understand what that thing you're pointing at them is. Give them a little slack. 
  • Do not use flash. Flash will startle them and make them even more uncomfortable. It will also cause them to blink in reaction to the bright light, which could cause your photograph to be a half blinking animal.
Wild:

  • Use a telephoto lens if they are an animal that you cannot pick up and touch. Most animals will fall into this category. The only exception is if the animal lets you approach and touch it without showing any signs of anxiety. Very few animals will allow this, so using a telephoto lens allows you to stay at a comfortable distance and still capture the animal as if if you were closer to them.
  • Don't make any sudden movements. Sudden movements will scare them, and if they're scared, they will run away. Well, you can kiss that awesome photo you were about to take goodbye.
  • Don't make loud noises. This is for the same reason as above. Loud noises can scare wild animals and they will run away from you.

  • Once again, don't use your flash. This is even more important with wild animals. The flash will scare them, and with prey animals, such a bright, traumatizing light could even give them a heart attack. Small animals that are hunted by predators often will have a heart attack if they get scared enough because it allows them to miss the pain of being eaten if they're caught by a predator. 
  • Be patient. You cant expect to get that perfect photograph right away. Be patient and don't give up. You may have to sit in one place for an hour or more just to get one good photo. Don't be afraid to wait for the right moment.


May 5, 2016

How I Started Photogrpahy


Any time my family would take a trip anywhere, even if it was close by, my mom would want to take hundreds of pictures of everyone. I didn't mind when I was really little, but as I grew older, I started to want a way out of the deadly photographs my mom was constantly taking and so I decided to try taking the pictures instead. I was about nine at this point and the only camera I'd ever used was a tiny toy.

Eventually, the camera began to work it's magic in my mind and I grew more interested in learning about how to use it better. I soon wanted my own, and later I got my first camera: a Sony DSC-W530. 


Several years passed and I enjoyed playing around with the little Sony, unaware that the world of photography included much more than a simple camera. When I discovered how much more there was to learn, I immediately started diving in.
I soon realized that I would need a knew camera.
My little Sony had served me well, but it was time for an upgrade. 
After what seemed like forever of searching the web for the best camera in my price range, I settle on  Nikon D5200 DSLR.
That is the camera I currently own and I'm very happy with it.


Playing with Fire

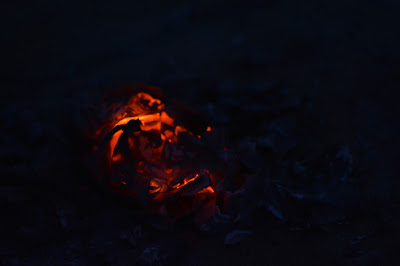
Fire can be a really fun subject to photograph as long as you take the proper precautions to avoid burning your house down or setting your hair on fire.


May 4, 2016

Three Kinds of Photography

Photography can be done in many forms. Each form can take a long time to master, and some are harder to learn than others, but all are beautiful in their own ways. 
Let's take a look at three of those forms:

Landscapes


Landscapes are usually wide shots; they can include land, water, or both. The sky usually covers the top third of the image, however, there are some occasions when the sky may take up more space. 

Portraits


Portrait photography is any photograph with a person in the frame. One of the most important parts of a portrait are the eyes. If the eyes are out of focus and blurry, the image usually loses an important part. The eyes let the viewer connect with the subject of the image. Positioning is also important. A portrait photograph is often best with the subject placed slightly to the right or left side of the photograph; this is because of the rule of thirds, which applies to many other types of photography as well.

Macro / Close Up


Macro is a photography that has a one to one ratio of something that is usually very small. Close ups are similar to macro, but they are not quite as close as 1:1. Macro photography shows an image of something that is small and portrays it in the camera view as the size it is in real life. It also has a shallow depth of field due to the close focusing distance that is needed.


There are Rabbits Living in My Yard!

I saw this rabbit outside my house just sitting in the yard like a statue; grabbing my camera and popping on a telephoto lens, I put the camera on a tripod and took a few shots of the animal. It was hard to get a good angle from my position, so I went around the house and approached the rabbit outside. Because my lens zoomed to 300mm I could stay relatively far away and still get a good shot.
The rabbit had clearly spotted me and it was watching me carefully for any threatening moves I might make. My little brother came running out to see and the frightened animal became even more tens. She watched us carefully, ready to run at a split second's notice. But something seemed to be stopping her. My two younger sisters and mom approached the scene and that was all the warning that rabbit needed. She bolted toward the nearby tree line faster than I could click the shutter button, but then she stopped and just stared at us.
As we drew closer to the spot she'd been sitting, we became aware that there was a nest. The reason the rabbit had stayed so long, and was watching us now, was because she was looking out for five adorable baby rabbits.

The babies were burrowed into a warm and comfy hole in the ground and covered with a soft blanket of their mother's fur.

After a few photographs, I left them alone to wait for the return of their mother in the soft interior of their tiny home.


May 3, 2016

Eyes


Eyes are an extremely important element of any portrait. You can have a perfect composition, beautiful colors, and an amazing model, but if you get the eyes wrong, your photograph will suffer.
When shooting a portrait, the best thing to focus on are the eyes. It doesn't matter if the hair is a little less sharp and it's ok if the arm is a bit out of focus. What's not ok is if the eyes are blurry. There are very few occasions when you may want the eyes to be out of focus. For the majority of the time, you will want eyes that are a sharp as possible.
Sometimes using auto-focus makes this task very difficult. It will focus on the hair or the nose, or just about anything but the eyes. Even the eye lashes can drag the focus away from the detail of the eyes if your depth of field is shallow enough to let it. So don't be afraid to switch of the auto-focus and go manual.
When you've got your eyes sharp and in focus, there are still other ways to make them pop. You can use color matching: have your  model wear an outfit that accents or matches their eyes. Or shoot with elements in the photo that the same colors as your model's eyes.
You can also make the color pop in post. If you have Photoshop, try creating a layer mask that only effects the eyes. Bring up the contrast and saturation a bit. Be careful with the saturation, though. You want to keep the original color of the eyes. (Unless you actually are trying to change the color.)

Macro Filter on a Kit Lens: What to Expect

Macro filters are a great way to get closer to your subject for some awesome close up shots. When using a macro filter on a standard kit lens (18-55mm) you most likely will not be able to get those super close macro photos that you may see when you google 'macro'.
The filter will, however, allow your camera to focus at a much closer distance from your subject. This will allow you to capture great details of small subjects.
But, of course, there's a catch. You're depth of field is going to be extremely shallow. The slightest movement of the camera can send your focus totally off. Using a tripod will help tremendously with this, but if you're shooting low to the ground or in an awkward position, a tripod may not always be possible. This is why you should set your camera to a fast shutter speed and use the burst option so that you can hold the shutter button and your camera will take multiple shots in fast succession. The majority of the images you capture with this method will probably be out of focus, but there will also be one or two that should be in focus. If not, just try again. Make sure to have some kind of support for your arms if you're doing it handheld because even if you don't notice it, your hands are probably moving enough to ruin your focus.

Note: If your filter is cheap, it may cause the image not to be as sharp. Usually this can be fixed in post-processing by using a sharpening tool. It helps to shoot in RAW so you can preserve as much detail as possible and keep a good quality image.

May 2, 2016

On-Camera Flash

The on-camera flash (the flash that's built into your camera) is on the top of the camera body and it sends a flash of light forward about 10 feet from the camera.

It's the perfect tool for lighting up dark subjects, right? It'll expose the image perfectly because light is light and as long as you get it into your photo, it'll all be good. No. No. No.
On-camera flash is just about the worst possible thing you could choose to do to light up a dark image.
The built in flash is a very harsh light that sends hard shadows into your photo. It creates red eyes, an unprofessional feeling, and doesn't send the light far enough to evenly light your photograph. It can also create an ugly shadow from your camera's lens.
Take a look at these two images. Try and guess which one used the flash.


Yeah, it's not that hard to tell the difference, is it? The flash may light up the subject and separate it from the background, but it does so using a very unflattering light.
If you need more light in your image here are a few solutions that don't include a damaging on-camera flash:


  • Set your camera to a longer exposure. Watch out for unwanted motion with this one. If your subject moves, it could become blurry.
  • Use an external flash. Either on the hot-shoe or off camera in slave mode. Most external flashes will provide much better results than the built in flash.
  • Bump up your ISO a bit. Careful, though! ISO is a dangerous option to mess with when you start getting above 400. You wouldn't want too much noise in your image.
  • Open your aperture. But keep in mind that the wider your aperture gets, the shallower you're depth of field becomes.

May 1, 2016

DIY Reflectors

Why buy a reflector when you can just make one? Try out these three DIY reflectors made with materials you can find around your house!
Note: if you have anything like foam board or something sturdy like that, you can substitute it for cardboard for a more durable reflector.

1. Silver Reflector


Materials:
  • Cardboard (it can be any cardboard as long as it's big enough for the size you're going for.)
  • Aluminum foil
  • Tape
How to do it:
  • Cut the cardboard into a rectangle. (or circle, square, or really any shape you want.)
  • Wrap the aluminum foil around the cardboard until all you can see is the shiny aluminum foil; no cardboard.
  • Smooth it out as best as you can. Make sure the edges of the foil fold into the side you want to be the back. 
  • Tape down the foil in the back so it won't come off.
  • Optional: cut more cardboard to create a handle and tape it to the back.
  • Go out there and take some awesome photos with your new reflector.

2. White Reflector


Materials: 
  • Cardboard
  • White paint
  • Plastic wrap
  • Tape
(if you have white card-stock or something sturdy and white, you could also just grab that and use it as a white reflector) 

How to do it:
  • Cut the cardboard to the shape you want.
  • Paint the cardboard white. You may need several coats of paint to get a solid white, but take your time because the whiter it is, the better it will work for you.
  • After the paint is dry, wrap it in one tight layer of plastic wrap. 
  • Tape the plastic wrap in place and you're done!
You can do this with any color you want.

3. Black Reflector


Materials:
  • Cardboard
  • Electric tape (or black duct tape)
  • Plastic wrap (optional)
How to do it:
  • Cut the cardboard to the shape you want
  • Wrap the tape around the cardboard until it's completely black.
  • If you want a shiny finish, you can put a tight layer of plastic wrap around it.
That's it! 

Easy, right? 

Now go try them out and get creative!